Those of you who are regular readers have probably heard me mention the idea of organizing your home in zones. We like this concept and the more you think about it the more sense it makes. It is a way to work smarter not harder in your space.
Think about the kitchen and the different zones that might apply in this room.
In our last Mama Bear in the Kitchen video we focused on the fridge and the sink section of my kitchen.
Today we are going to look at zone #2. For us that is the beverage zone, bank of drawers and this area above the stove.
You can also check here for tips on organizing your spice zone.

When we moved into our tiny house these two upper cupboard doors (on each side of the stove) were clear glass, so you could see everything inside the cupboards. There is a time and a place for that style of doors, but for me it is not in a small kitchen like mine. They might be for a large kitchen where you can afford to just have “pretties” stored in them – a lovely simple display that is pleasing to the eye.
My first thought when I saw these doors (and knowing it was an IKEA kitchen) was that I would get new solid doors to replace the glass ones. However, I had the brain wave that I had nothing to lose by painting the inside of the glass white, thus giving the appearance of a solid door. I used chalk paint – which promises it will adhere to any surface – and I had great results. Money saved! Four years have gone by and the paint shows no sign of wear.
The one thing I did do in order to maximize every possible inch of storage space in my kitchen cupboards, was to go to IKEA and buy few extra shelves extra shelves.
Getting back to zones – we would refer to this are we are talking about today as the beverage centre. On the counter we leave out our coffee maker and kettle. We do use both of these a lot that is why I choose to leave them out.
The lower shelves of this upper cabinet are prime real estate. Be sure you keep items here that you access on a regular basis.
We have our coffee supplies on the lowest shelf
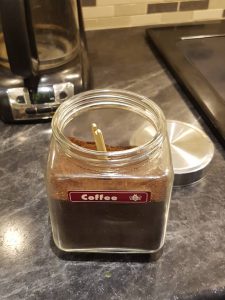
- coffee (with scoop inside) – 2 containers. Keep the large can in another area that is not in prime real estate
- filters in a basket that is just the right size
- tea bags
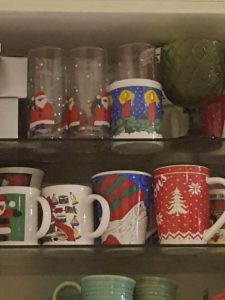
on the 2nd shelf are the everyday mugs
- use the shelf space as a boundary. I get it that on different days we feel like different mugs. We like different mugs for tea than we do for coffee. Mugs can be souvenirs. Mugs can multiply. I get it! We have had a lot of clients who have really huge mug collections. I really encourage you though to give yourself a boundary. This spot needs to allow space for all the mugs when they are clean. If you get a new mug, this boundary still has to work. It means you need to have the rule of one item in and one item out in order that the entire collection fits nicely.
on the 3rd shelf (which is a little harder to access)
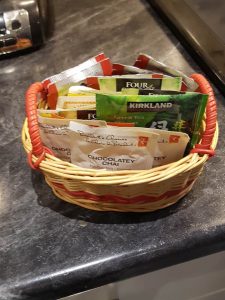
- we have our mugs for company. They are a matching set and a bit smaller than the ones we like to use for ourselves day to day. My cream and sugar and my small variety basket of teas (to offer to company) are here.
- on the subject of variety of tea – I know that some of you have huge tea collections. Again, you need to assign yourself a boundary and then stick with it. I’d advice putting the selection of boxes into a bin so that you can pull it easily from the shelf to make your selection.
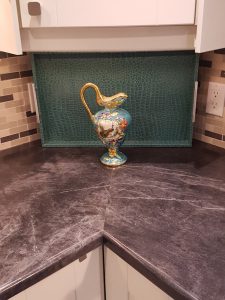
- I have a spot where I store my teas and my teapot in the corner of counter behind this tray. It makes a great storage spot where you can keep items hidden so the counter still appears clear and uncluttered
- Moving up to my two top shelves I have my Christmas glasses and mugs. This was the advantage to me in getting an extra shelf to put into this cupboard. I really maxed out the space.
For quite a few years I used to put my Christmas mugs and glasses away with my Christmas decorations. Then I clicked to the fact that if I could find storage for them in my kitchen (where they weren’t in prime real estate) I would be working smarter not harder. I do need to use my step ladder to access these top 2 shelves, but it is something I’m willing to do. In late November I take the Christmas things down from this area and and put my regular items up again.
The bank of drawers –
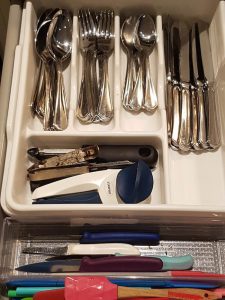
top drawer cutlery
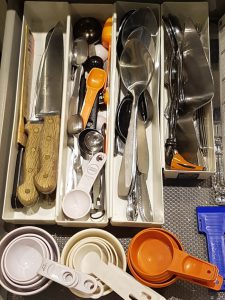
2nd drawer – things for measuring, cutting and serving
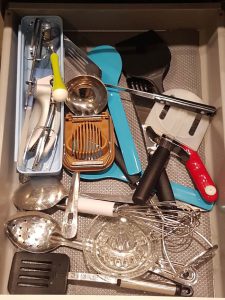
3rd drawers – gadgets
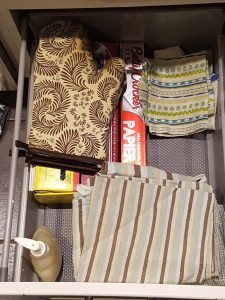
4th drawer – wraps, tea towels/dish cloths, oven mits
Moving over now a little further.
I want to make one quick mention to the oven drawer. My warning is not to overload this drawer. Think about lightweight items you can store here. Best to use if for items like cookie sheets and pizza pans. Store cookware, frying pans and pyrex baking dishes on the solid shelves in your cupboards.
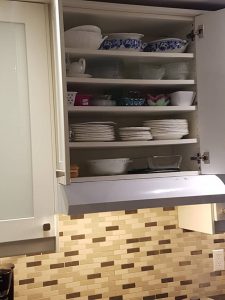
My area above the range hood provides a lot of storage for me. When we bought our house there was a built in microwave in this area and then a much smaller bank of cupboards than what I now have. We don’t use a microwave, so I immediately decided to have it taken out, along with the smaller cupboard unit. We went to IKEA and bought the taller unit to install in this area. I also opted for a few extra shelves to add this unit as well.
Look at all that I’m able to store in this area!
There is space for all my good dishes and serving pieces and they are easy to access because they are stored right in my kitchen. The bottom shelf is prime real estate so I use that for some everyday glass fridge storage items.
Stay tuned for our next visit to Mama Bear’s kitchen when we have a look at the final zone!
If you need some hands on help in getting your kitchen organized and working well, don’t hesitate to contact us to book your free initial consultation!




Great ideas, I love how you use your space to the max. I always learn something.
Thanks
Thanks for your positive feedback Sharon!
ds